There’s nothing more satisfying that making a homemade loaf of bread using a sourdough starter you created yourself – it truly is like having a child! With two simple ingredients – flour and water, you can create something that will last a lifetime. It will leaven your bread and nourish your soul. This guide will show you how to create your very own sourdough starter from scratch, day by day.
- What is Sourdough Starter?
- Tools and Ingredients Needed
- How to Create Your Starter – Day by Day
- Maintenance Feeding
- Gluten-Free Sourdough Starter
What is Sourdough Starter?
Put simply, a sourdough starter is fermented flour that contains beneficial bacteria and yeast that work together to rise your bread. Beyond just rising bread, it also provides amazing flavor that you can’t find anywhere else. Because of the bacteria and yeast, a sourdough starter is a living thing that needs to be fed and cared for in order to thrive. It needs flour, water, and a warm environment to become active and bubbly to do its job.
Before you worry that you don’t have time to care for something like a “child” – know that it doesn’t really take up that much of your time. If you only bake occasionally, you only need to feed it once per week. If you are like me and you bake often, it will be more than that, but I’m guessing if you are like me, it won’t feel like a chore at all. It will become part of your daily routine and it only takes a couple of minutes.
Tools and Ingredients Needed
Before you begin, you will need a few things to create your starter.
- Rye or Whole Wheat Flour – this will be used on the first day only, unless you want to maintain a rye or whole wheat starter.
- All Purpose Flour – this is the flour you will use to feed your starter on a regular basis. You can also use bread flour if you prefer.
- Water – use filtered water and make sure you warm it slightly before using it.
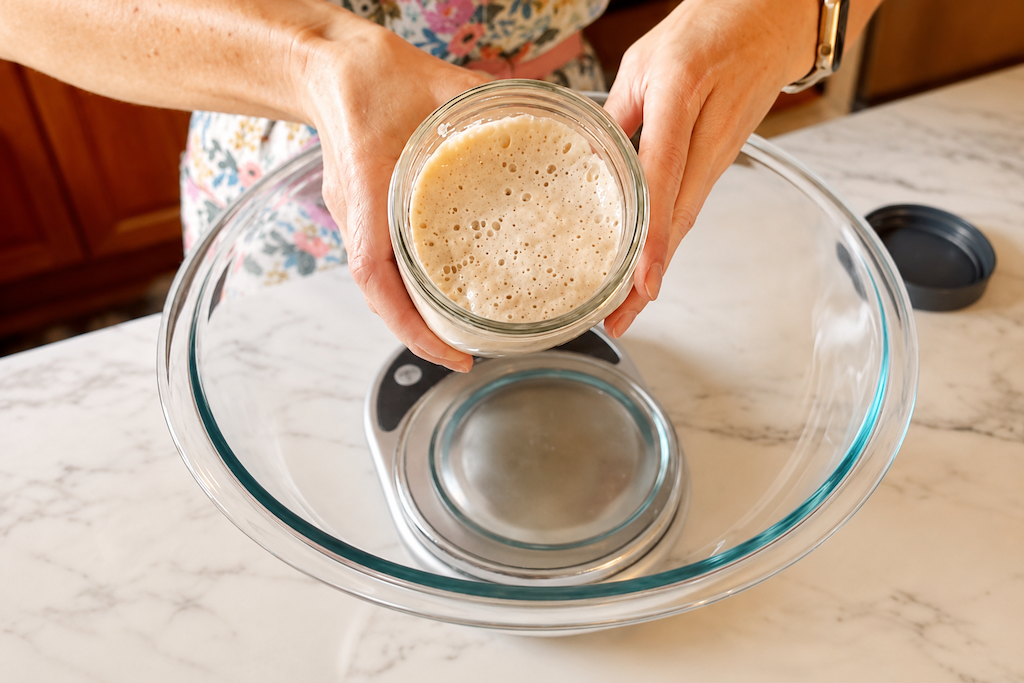
- Kitchen Scale – this is very important to have, especially when starting out. Volume measurements like cups are not as reliable as weighing your ingredients. A cup of water and a cup of flour are very different.
- Pint Size Mason Jars with Lids – this is where your sourdough starter will live. You need at a least two of these to get started.
- Jar Spatula – these are really nice to have for stirring your starter. If you don’t have one, you can also use a chopstick, but a spatula works best.
How to Create Your Starter – Day by Day
For this example, I am going to say to feed at 8:00 AM and 8:00 PM, but do what works for you, it just needs to be 12 hours in between.
Day One
8:00 AM – Add 50g rye or whole wheat flour to a clean pint jar. Pour in 50g warm filtered water and stir well until no dry bits remain. It will be quite thick. Put the lid on loosely and place in a warm spot. Somewhere that is between 75-79 degrees F is ideal. I highly recommend purchasing a proofing box if it is within your budget.
8:00 PM – Take the lid off and give it a stir. You probably won’t notice much difference at this point. It is normal that it won’t smell or look pleasant! But, don’t worry it will transform soon enough! Put it back in your warm spot.
Day Two
8:00 AM – Open the lid and give it a stir. You should see some air pockets and it should have risen. Pour 50g of the starter culture into a clean pint jar. Add 50g all purpose flour and 50g warm water. Stir well and replace the lid. Place a rubber band around the jar where the starter begins. This will help measure how far it is rising. Place the jar back in the warm spot.
8:00 PM – Repeat exactly what you did at 8:00 AM and put back in the warm spot.
Day Three
8:00 AM – Open the lid and give it a stir. You should see more bubbles. It still won’t smell great, but give it time! Repeat the steps from day two. Get a clean jar, add 50g starter, 50g all purpose flour, and 50g warm water. Replace the lid and rubber band. Return to the warm spot.
8:00 PM – Repeat steps from morning and return to the warm spot.
Day Four
8:00 AM – Open the lid and you will notice the color is starting to lighten and more bubbles should be present. It should have risen above the rubber band, but probably not doubled. Repeat the steps from yesterday. To a clean jar, add 50g starter, 50g All purpose flour, and 50g warm water.
8:00 PM – Repeat steps from morning and put back in the warm spot.
Days Five – Ten
Keep repeating the steps morning and night until your starter is consistently doubling (or more!) in size and falling back down after 12 hours. When it is ripe it should have a sweet pleasant smell with lots of bubbles. Now all you need to do is give it a name and start baking!
When you’re ready to make your first loaf of bread, checkout my recipe for Everyday Sourdough Bread.

Maintenance Feeding
If you only bake once a week or less, you can keep your starter in the refrigerator and pull it out when you need it. Just feed it equal parts, starter:flour:water and let it sit loosely covered at room temperature until it has at least doubled in size with lots of bubbles.
If you bake a lot, you can keep your starter on the kitchen counter and feed it once a day. Store your extra starter in the refrigerator to use in discard recipes such as pancakes, muffins, scones, cakes, etc.
Gluten-Free Sourdough Starter
You can easily make a gluten-free sourdough starter by using brown rice flour instead of all purpose flour. For the first day, use something like buckwheat instead of rye. I have many gluten-free sourdough recipes if you are interested in learning more. If you want to take it a step further checkout my guide for creating a grain-free sourdough starter using almond flour and cassava flour.




Leave a Comment