
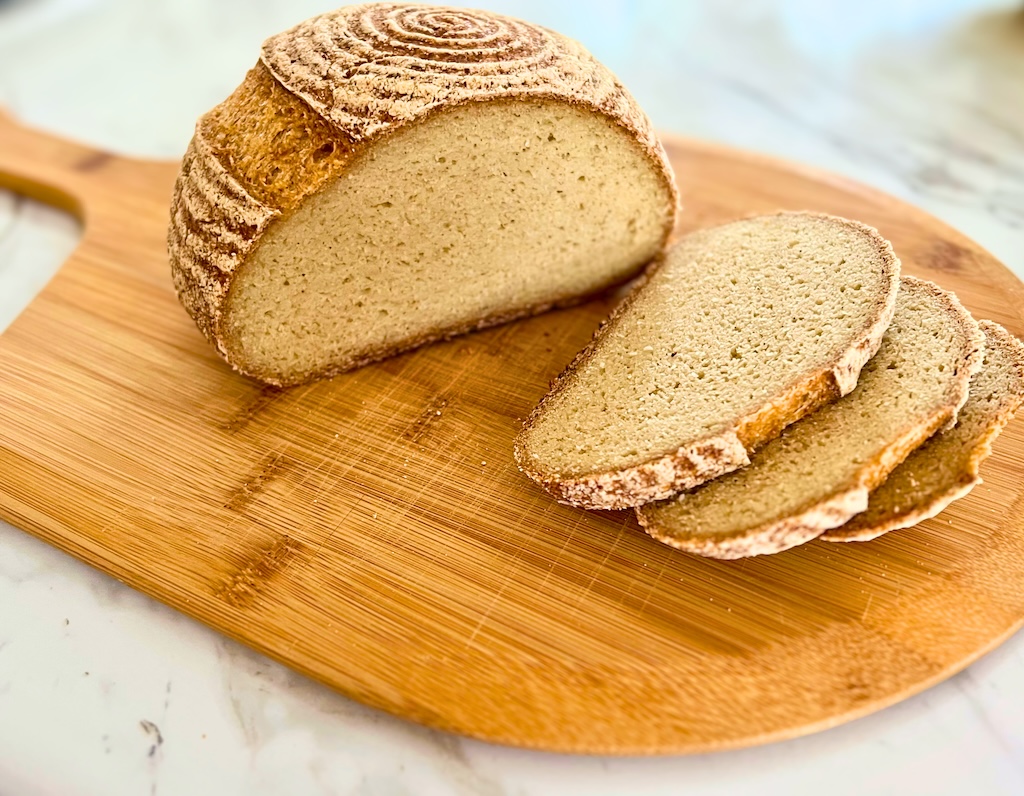
This nourishing grain-free sourdough bread is simple and delicious. It is made with only two flours, almond flour and tapioca flour, which are both grain-free. The sourdough starter is made grain-free with a combination of cassava and almond flour. This bread is amazing and perfect for anyone embarking on a grain-free or gluten-free journey.
Updated: November 9, 2025
How to Convert a Gluten-Free Sourdough Starter to Grain-Free
Before you make this bread, you will need a grain-free sourdough starter if you need it to be fully grain-free. If you don’t, then feel free to use any starter that you already have. You can make one from scratch using my method here, or you can convert your existing gluten-free starter to grain free.
You will be feeding your starter with 60% cassava flour and 40% almond flour to create the perfect balance of starch and protein. One big difference in feeding this grain-free starter is that you will need quite a bit more water than with the gluten-free starter. You will add an extra 25g of water because Cassava flour is very thirsty and it will be dry and pasty if you feed with an equal amount of water as you would a regular or gluten-free starter. Depending on the consistency of your gluten-free starter, you made need a little less water. You are looking for a thick pancake batter consistency. Here are the steps:
- To a large bowl or container with a lid, add 600g Cassava Flour and 400g Almond Flour. Combine well with a whisk. This will be the flour blend you feed your grain-free starter with.
- To a clean pint jar add 50g of your gluten-free starter, 50g grain-free flour blend, 75g warm water. Stir well to combine. Loosely cover with a lid and let sit at warm room temperature until almost doubled in size.
- Continue to feed regularly with the grain-free flour blend. If left on your kitchen counter, you will need to feed it once per day with the instructions in step 2. If you decide to keep it in the refrigerator, pull it out at least once a week to feed it.
Now you have your very own grain-free sourdough starter to use in a variety of recipes!

What you Will Need
- 75g Grain-Free Sourdough Starter – your starter should be fed and active for this recipe.
- 280g Warm Water – the amount of water can fluctuate depending on the humidity in your home and the texture of your starter. Feel free to add a little more or a little less if needed.
- 20g Whole Psyllium Husks – psyllium powder tends to clump, so I don’t recommend it.
- 20g Cane Sugar – you could substitute with granulated sugar.
- 130g Almond Flour – use blanched almond flour for best results.
- 180g Tapioca Flour – arrowroot powder is a good replacement if needed.
- 8g Salt
How to Make Grain-Free Sourdough Bread
Start by adding the sugar and psyllium husks to the warm water. Stir immediately to fully combine. The psyllium will form a gel that acts as the “gluten” to bind the ingredients to make a dough. Set aside while you weigh the dry ingredients.
To a small to medium bowl, add the almond flour, tapioca flour, and salt. Whisk to combine.
Add the grain-free sourdough starter to a large mixing bowl. Then add the psyllium/honey mixture and whisk to combine.
Add the dry ingredients to the wet ingredients. Use a dough whisk to loosely bring it together. Then start using your hand to fully combine the ingredients until a dough forms and no dry flour remains in the bowl. This should take about 2 – 3 minutes. Add a tablespoon of water at a time if it seems too dry, but don’t add extra water too soon! It will absorb water as you mix. If it is still dry after combining for several minutes, then add a little more water.
Sprinkle a little tapioca on your counter and then shape the dough into a smooth round ball. Add the dough to a lightly floured 7 inch banneton basket.
Place the banneton in a freezer bag and seal. Let it sit at room temperature (70-75 degrees F) for 5-7 hours. It will puff up but it won’t fill the banneton. It should almost come to the 3rd rim from the top of the banneton. If the temperature of your home is cooler it will take longer, and if it is warmer it will take less time.

When the dough is almost fully proofed, place a pizza stone inside your oven and place a 2.8 quart dutch oven (without the lid) on top of the stone. Using the small dutch oven helps to prevent the bread from falling flat while baking. Preheat your oven to 500 degrees F. Set a timer for 1 hour.

Turn the dough out onto a piece of parchment paper and score it as desired.
Remove the dutch oven from the oven and carefully place the dough on the hot pizza stone (still on the parchment paper). You can either remove the pizza stone to put the dough on it or you can use a pizza peel to transfer the dough to the stone.
Turn the oven temp down to 450 degrees F and bake for 30 minutes.
Take the lid off, turn the oven to 400 degrees F and bake for 40 minutes.
Take the Dutch oven out of the oven. Then place the bread directly on the pizza stone. Turn the oven down to 350 degrees F and bake for 30 more minutes. Wait 10 minutes before removing the bread from the oven after turning it off.
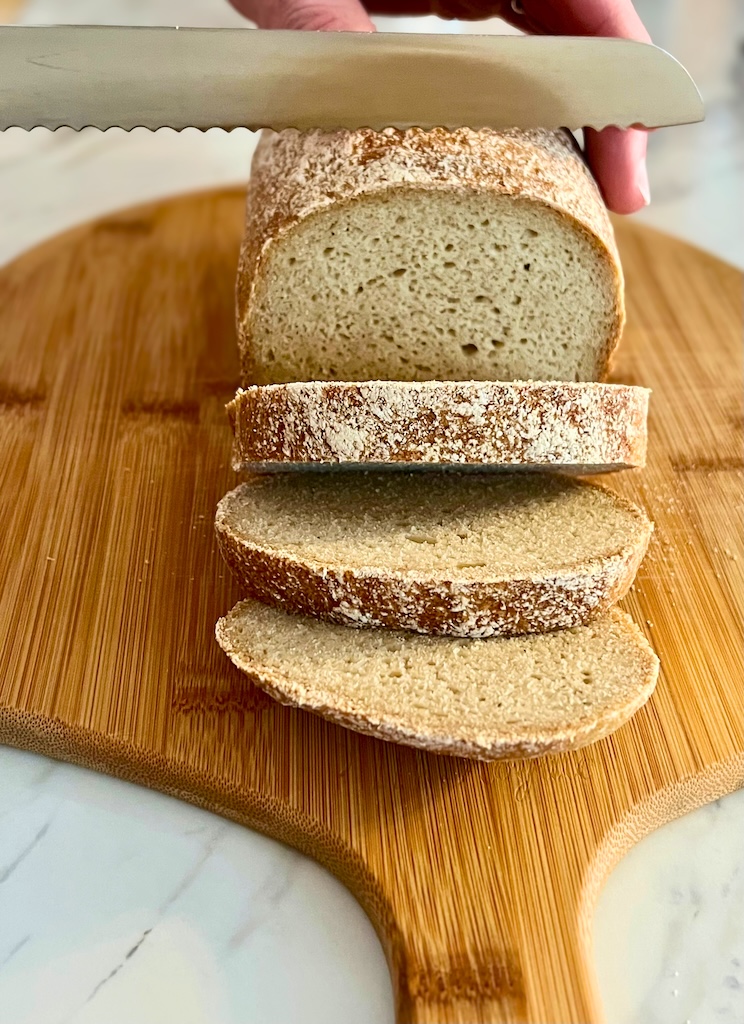
Let the bread cool completely on a wire rack, at least 4 hours, for best results wait until the next day.

FAQ’s
Can I use a larger Dutch oven?
Yes! You can use a larger Dutch oven. However, you will find that the bread will not hold its shape as well.
Can I use a regular starter?
Yes! You can use a starter fed with any flour that you can tolerate. You can even use a starter fed with wheat flour if you aren’t sensitive to it.
Is there an alternative to almond flour?
I have not had success replacing almond flour in this recipe. However, feel free to experiment with different flours and see what works for you. I would love to hear from you if you find something that works!
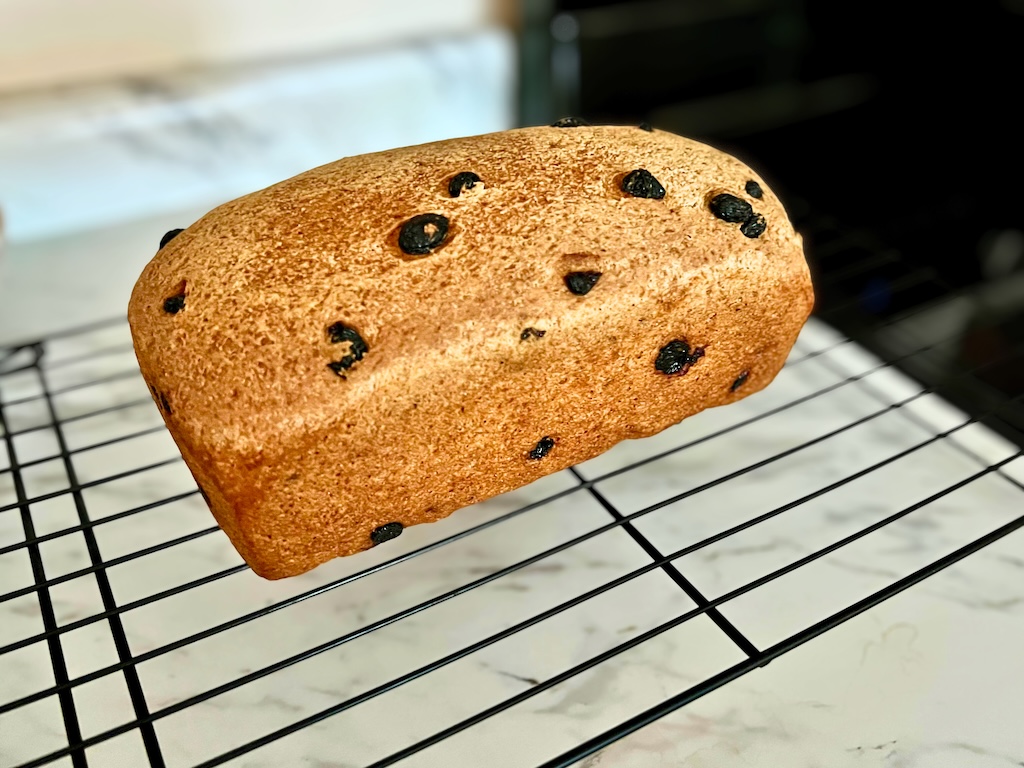
Can this bread be baked in a loaf pan?
Yes, you can bake it in a loaf pan – I would recommend checking out my recipe for grain-free sourdough sandwich bread which shows how you can bake it using another loaf pan on top to still get the required steam while baking.

Grain-Free Sourdough Bread
Equipment
- 1 7 inch Banneton
- 1 2.8 quart dutch oven
- 1 Kitchen Scale
- 1 Pizza Stone
- 1 Dough Whisk optional
Ingredients
- 75 g grain-free sourdough starter
- 280 g warm water
- 20 g cane sugar
- 20 g psyllium husks
- 180 g almond flour
- 130 g tapioca flour
- 8 g salt
Instructions
- Add honey and psyllium husks to the warm water and stir well to combine. Set aside while you weigh the dry ingredients.20 g cane sugar, 20 g psyllium husks, 280 g warm water

- Add the almond flour, tapioca flour, and salt to a medium sized bowl. Whisk to combine.180 g almond flour, 130 g tapioca flour, 8 g salt
- Add the starter to a large mixing bowl. Then add the psyllium/honey mixture and whisk well to combine.75 g grain-free sourdough starter
- Add the dry ingredients to the wet ingredients and whisk, using a dough whisk until loosely combined. Then use your hand to continue combining until a dough forms and no dry flour remains in the bowl.
- Shape the dough into a smooth ball on your counter. You might need to use a little white rice flour or tapioca flour if it is too sticky.
- Place the dough into a lightly floured 7 inch banneton. Then place the banneton in a freezer bag and seal.
- Let the dough rise at warm room temperature for about 5-7 hours, until it has puffed up. It will not reach the top of the banneton. The exact timing depends on the temperature of your kitchen. It will take less time in warmer temperatures and more time in cooler temperatures.
- One hour before you want to bake, place a pizza stone on the lower middle oven rack and place a 2.8 quart dutch oven on it (without the lid). Then preheat the oven to 500℉.
- Turn the dough out onto a piece of parchment paper and score as desired.

- Remove the dutch oven from the oven and gently place the dough (still on the parchment paper) on the hot pizza stone and cover with the dutch oven. Turn the temperature down to 450 degrees F and bake for 30 minutes.

- Remove the dutch oven and turn the temperature to 400℉ and bake for 40 minutes. Then turn the temperature down to 350℉ and bake for an additional 30 minutes. Turn the oven off and wait 10 minutes before removing the bread.

- Let the bread cool on a wire rack for at least 4 hours.


Leave a Reply to Laura SchoenherrCancel reply